Step 1: Begin by downloading and installing the Smart STB App from your smart TV’s app market. Next, to initiate the testing phase, you’ll need to locate the Software MAC Address necessary for app activation on the Smart-STB site. Follow these steps:
– Select “System Settings.”
– Then, choose “Device Info” to find the Software MAC address required for app activation on the Smart-STB website and the Virtual MAC address needed for IPTV service activation.
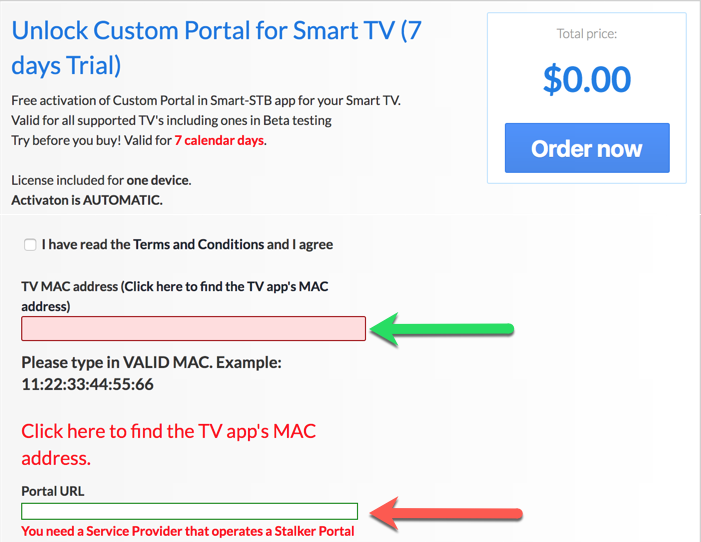
Step 2: After obtaining the MAC address information, it’s time to activate the app trial period. Visit the trial activation page on the Smart-STB website using this URL: https://smart-stb.net/index.php?_url=/order/unlock-custom-portal-for-smart-tv.

– Enter the Software MAC Address in the designated field and, optionally, the stalker portal URL of your IPTV provider.
– Check the Terms of service box and click “Order Now” to proceed.
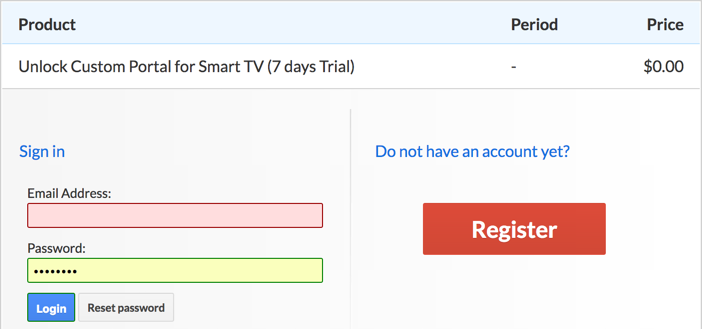
Step 3: Registration on the Smart-STB website is required. If you haven’t registered yet, do so at https://smart-stb.net.

– Click on “CheckOut.”
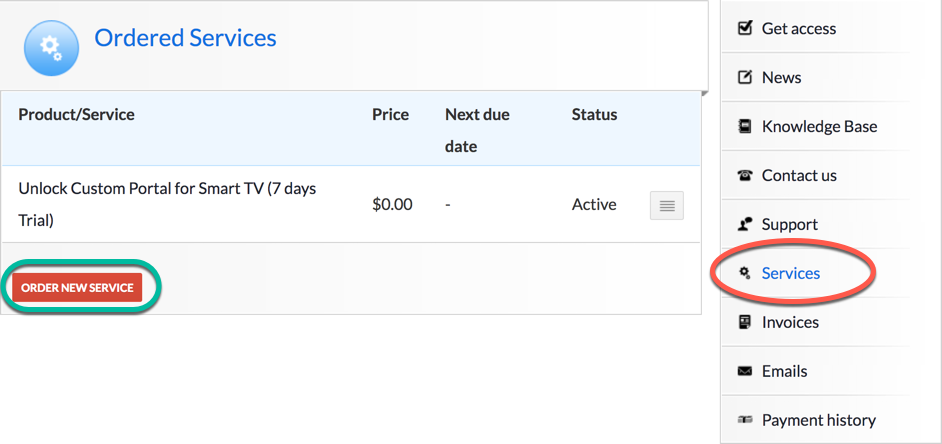
– Upon successful activation, the Order Status will be set as “Active,” indicating that the trial period has commenced.
– Check the “Device Details” page on the app installed on your TV to confirm the trial’s start and the indicated expiry date.
Activation of Paid Licenses:
– Log in to your account on the Smart-STB website.

– Click on “Services” from the left menu, then select “Order New Service” to add a paid license.
Installation of IPTV Stalker Portal:

– Once activated, provide the Virtual MAC address to your IPTV provider for registration.
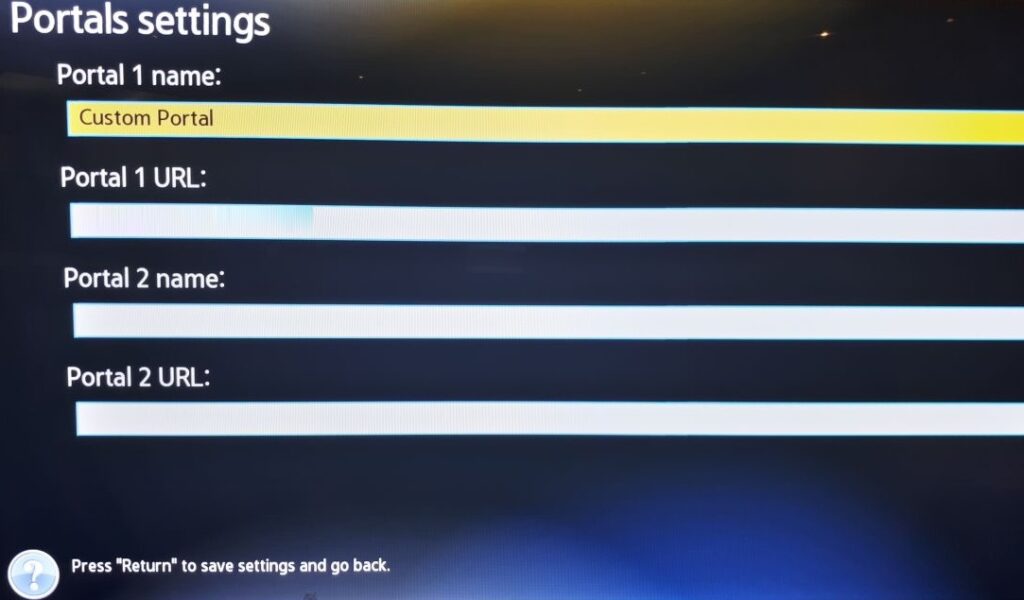
– Receive the stalker portal URL from your provider and follow these steps to input it into the app:
– When the “Loading Portal” sign appears, press enter.
– Navigate to “System Settings” and choose “Portal” to input the portal URL.
– Restart the portal, and upon app restart, the IPTV portal should load with bouquets and IPTV service details.
